
Growing Succulent Seeds at Home: A Step-by-Step Guide

Succulents have become increasingly popular in recent years, with their unique shapes and vibrant colors adding a touch of natural beauty to any space. While many people choose to purchase fully-grown succulents from nurseries or garden centers, growing them from seeds can be a rewarding and cost-effective way to expand your succulent collection. However, successfully germinating and growing succulent seeds can be a bit challenging for beginners.
We will provide a step-by-step guide on how to grow succulent seeds at home. We will start by discussing the different types of succulent seeds and the best species for beginners. Then, we will explain the necessary materials and conditions for successful seed germination. We will walk you through the process of sowing the seeds, caring for the seedlings, and transplanting them into individual pots. Additionally, we will provide tips and tricks to ensure the long-term health and growth of your succulent plants. By following our guide, you will be able to enjoy the satisfaction of growing your own succulents from seeds and watch them flourish into beautiful plants.
Content
- Choose a variety of succulent seeds that you want to grow
- Prepare a well-draining potting mix for the seeds
- Sow the succulent seeds on the surface of the potting mix
- Lightly cover the seeds with a thin layer of soil or vermiculite
- Mist the soil with water to keep it moist but not waterlogged
- Place the pot in a warm and bright location, but avoid direct sunlight
- Maintain a consistent temperature of around 70-75°F (21-24°C)
- Water the seeds regularly, making sure not to overwater them
- Be patient and wait for the seeds to germinate, which can take a few weeks
- Once the seedlings have grown, gradually acclimate them to more sunlight
- Transplant the seedlings into individual pots when they outgrow their containers
- Continue to provide proper care and maintenance to your succulent plants
- Frequently Asked Questions
Choose a variety of succulent seeds that you want to grow
When it comes to growing succulent seeds at home, the first step is to choose the variety you want to grow. There are countless options available, each with its own unique characteristics and requirements. Whether you prefer the popular Echeveria or the exotic Lithops, it's important to select seeds that align with your personal preferences and growing conditions.
Consider factors such as the level of sunlight your home receives, the average temperature, and the amount of care you can provide. Some succulent varieties thrive in bright, direct sunlight, while others prefer partial shade. Similarly, certain succulents are more tolerant of colder temperatures, making them ideal for indoor cultivation.
It's also worth considering the size and growth habit of the succulent. Some varieties stay small and compact, making them suitable for small spaces or containers, while others can grow into large, sprawling plants that require more room to thrive.
Once you've taken these factors into account, you can start exploring different seed suppliers or nurseries to find the specific variety you desire. Look for reputable sources that offer high-quality seeds to increase your chances of success.
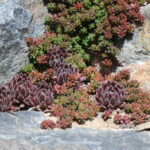 How to Propagate a Rock Succulent by Splitting: Step-by-Step Guide
Here are some popular succulent seed varieties to consider:
- Echeveria: With their rosette-shaped leaves and vibrant colors, Echeverias are a favorite among succulent enthusiasts.
- Lithops: Also known as "living stones," Lithops are fascinating succulents that mimic the appearance of rocks.
- Haworthia: Haworthias come in a variety of shapes and patterns, and they are known for their tolerance to low-light conditions.
- Sedum: Sedums are versatile succulents that can be found in various sizes and colors, making them a popular choice for beginners.
- Aloe: Aloe plants not only provide stunning foliage but also offer medicinal properties, making them a practical addition to any succulent collection.
Remember that succulent seeds can be quite tiny, so handle them with care during planting. Follow the specific instructions provided by the seed supplier to ensure optimal germination and growth. With patience and proper care, you'll soon witness the beauty of your chosen succulent variety sprouting from a tiny seed.
Prepare a well-draining potting mix for the seeds
Prepare a well-draining potting mix for the seeds
When it comes to growing succulent seeds at home, the right potting mix is crucial for their success. Succulents thrive in well-draining soil that allows excess water to flow out easily, preventing the roots from becoming waterlogged.
To create a suitable potting mix, combine equal parts of regular potting soil, perlite, and coarse sand. This combination ensures proper drainage while also providing enough nutrients for the seeds to germinate and grow.
Materials needed:
- Regular potting soil
- Perlite
- Coarse sand
- A container for mixing
Step-by-step guide:
- Measure equal parts of potting soil, perlite, and coarse sand.
- Place the measured ingredients into a container for mixing.
- Thoroughly mix the components until they are well combined.
Once your potting mix is ready, you can proceed to the next steps in growing your succulent seeds. It's important to note that using a well-draining potting mix is essential for the healthy development of succulent seedlings.
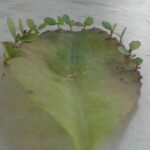 Can I Easily Propagate Succulents by Leaf Propagation?
Sow the succulent seeds on the surface of the potting mix
Succulent seeds are tiny and delicate, so it's crucial to handle them with care. Begin by preparing a well-draining potting mix, specifically formulated for succulents. Fill a seed tray or small pots with the mixture, leaving about a 1/4 inch space from the top.
Take a pinch of succulent seeds and sprinkle them evenly on the surface of the potting mix. Avoid overcrowding the seeds to give each one ample space to grow. Keep in mind that not all seeds will germinate, so it's recommended to sow multiple seeds in each pot.
Tip: To ensure good air circulation and prevent the growth of mold or fungus, avoid covering the seeds with additional soil.
Step 2: Provide adequate moisture
After sowing the seeds, gently mist the potting mix with water using a spray bottle. Ensure the soil is moist but not soaked. Succulent seeds require a delicate balance of moisture to germinate successfully.
Tip: To maintain the ideal moisture level, cover the seed tray or pots with a clear plastic lid or plastic wrap. This creates a mini greenhouse effect, trapping humidity and keeping the soil consistently moist.
 Water Propagation of Succulents: A Comprehensive Guide
Step 3: Place the seeds in a warm and well-lit location
Succulent seeds thrive in warm temperatures, so it's crucial to provide them with the right conditions. Place the seed tray or pots in a bright location, preferably near a window where they can receive indirect sunlight.
Tip: If natural light is limited, you can use fluorescent grow lights to provide the necessary illumination for the seeds.
Step 4: Patience is key - wait for the seeds to germinate
Germination times for succulent seeds can vary depending on the species. It may take anywhere from a few days to several weeks for the first signs of growth to appear. Be patient and resist the temptation to disturb the seeds during this crucial period.
Step 5: Gradually acclimate the seedlings to sunlight
Once the seedlings have emerged and developed their first set of true leaves, it's time to gradually expose them to direct sunlight. Start by placing them in a shaded area for a few hours each day, gradually increasing their exposure to sunlight over the course of a week.
 Dormancy in Succulents: A Guide to Varieties and Timing
Step 6: Transplant the seedlings
Once the succulent seedlings have grown a bit and become more robust, they are ready to be transplanted into individual pots. Carefully remove them from the seed tray or pots, taking care not to damage their fragile roots. Plant them in well-draining succulent soil and provide them with the appropriate care and maintenance as they continue to grow.
Final Thoughts
Growing succulent seeds at home can be a rewarding and exciting process. With the right techniques and a little patience, you can watch these tiny seeds transform into beautiful and unique succulent plants. Remember to provide them with adequate moisture, proper lighting, and a suitable growing environment to ensure their successful growth.
Lightly cover the seeds with a thin layer of soil or vermiculite
When it comes to growing succulent seeds at home, one of the most important steps is properly covering the seeds with a thin layer of soil or vermiculite. This layer acts as a protective barrier and helps create the ideal conditions for germination.
It is crucial to use a thin layer to ensure that the seeds receive enough light to sprout. Succulent seeds, in particular, require light to trigger the germination process. A thick layer of soil may block the necessary amount of light, hindering the growth of the seeds.
 Can Succulent Cuttings Be Planted Directly in Soil?
Additionally, using vermiculite as a covering material can be beneficial. Vermiculite is a lightweight and sterile material that retains moisture while still allowing for proper airflow. This helps create a favorable environment for seed germination by maintaining consistent moisture levels and preventing the seeds from drying out.
To cover the seeds, gently sprinkle a thin layer of soil or vermiculite over the planting surface. Aim for a depth of around 1/8 inch (3 mm), ensuring that the seeds are evenly distributed. Avoid burying the seeds too deeply, as this can impede their ability to germinate.
After covering the seeds, lightly press down on the soil or vermiculite to ensure good seed-to-soil contact. This will help the seeds absorb moisture and initiate the germination process.
Remember to label your planting tray or container with the name of the succulent species and the date of planting. This will help you keep track of your seeds and monitor their progress as they grow.
Mist the soil with water to keep it moist but not waterlogged
One of the most important steps in growing succulent seeds at home is ensuring that the soil remains moist throughout the germination process. However, it is crucial to strike a balance and avoid overwatering, as excessive moisture can lead to rotting and damping-off of the seeds.
To maintain the ideal moisture level, it is recommended to mist the soil regularly. This can be done using a spray bottle filled with water. Gently spray the surface of the soil until it feels damp, but not saturated. Be cautious not to drench the soil, as this can hinder seed germination and promote fungal growth.
 Propagation of Succulents: Cutting Techniques and Methods
Tip: It is advisable to use a well-draining soil mix specifically formulated for succulents. This type of soil helps prevent excess moisture and allows for proper airflow, which is essential for successful seed germination.
Place the pot in a warm and bright location, but avoid direct sunlight
When it comes to growing succulent seeds at home, providing the right environmental conditions is crucial for their successful germination. After sowing the seeds in a well-draining potting mix, it's important to find an ideal spot for the pot to thrive.
First and foremost, ensure that the pot is placed in a warm location. Succulent seeds require temperatures between 70°F and 80°F (21°C and 27°C) to germinate effectively. You can achieve this by keeping the pot indoors, near a window or in a greenhouse where the temperature can be controlled.
Additionally, it is essential to provide sufficient light for the seeds to germinate, but direct sunlight should be avoided. While succulents need plenty of light to grow, direct sunlight can be too intense for the delicate seeds. Instead, opt for a bright location where indirect light is available throughout the day. South-facing or east-facing windows are usually great options.
To ensure that the seeds receive consistent lighting, consider using grow lights if natural light is insufficient. LED grow lights or fluorescent lights can be set up at an appropriate distance above the pot to provide the necessary light spectrum for seed germination.
Remember, finding the right balance of warmth and light is essential for the successful germination of succulent seeds. By creating the ideal environment, you increase the chances of healthy seedlings and ensure a strong start to your succulent garden.
 Succulent Root Growth: Unveiling Patterns and Depths
Maintain a consistent temperature of around 70-75°F (21-24°C)
One of the most important factors in successfully growing succulent seeds at home is maintaining a consistent temperature of around 70-75°F (21-24°C). Succulent seeds require warm temperatures to germinate and thrive. Here are some tips to help you maintain the ideal temperature for your succulent seeds:
1. Use a Seedling Heat Mat
A seedling heat mat is a great investment when it comes to growing succulent seeds. These mats provide gentle, consistent heat that helps create an optimal environment for seed germination. Place the heat mat under the seed tray or pot to provide bottom heat, which will help speed up the germination process.
2. Place the Seeds in a Warm Location
Choose a warm location in your home to place the seed tray or pot. Look for a spot that receives indirect sunlight and is away from drafts or cold areas. This could be near a sunny window, on top of a shelf, or in a greenhouse. The warm temperature in this location will aid in the germination process.
3. Monitor the Temperature
It's important to regularly monitor the temperature to ensure it remains within the desired range. Use a thermometer to check the temperature in the area where you have placed the seed tray or pot. Adjust the location or use additional heat sources if necessary to maintain the optimal temperature.
4. Consider Using a Seed Starting Kit
If you're new to growing succulent seeds, consider using a seed starting kit. These kits often include a mini greenhouse or a clear plastic cover that helps create a warm and humid environment for germination. They also usually come with a heat mat and a tray designed specifically for seed starting.
5. Avoid Extreme Temperature Fluctuations
Succulent seeds are sensitive to extreme temperature fluctuations. Avoid placing the seeds in areas with sudden changes in temperature, such as near air conditioning vents or heating sources. These fluctuations can hinder germination and affect the overall success of growing your succulent seeds.
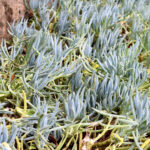
 Growing Blue Bean Succulents: A Guide for Home Gardeners
By maintaining a consistent temperature of around 70-75°F (21-24°C) and following these tips, you can create an ideal environment for your succulent seeds to germinate and grow into healthy plants. Patience and attention to temperature control will greatly increase your chances of success in growing succulents from seeds.
Water the seeds regularly, making sure not to overwater them
When it comes to growing succulent seeds at home, one of the most important steps is to water them regularly. However, it is crucial to strike the right balance and avoid overwatering. Succulents are known for their ability to store water in their leaves, stems, and roots, making them more tolerant of dry conditions. Therefore, they do not require as much water as other plants.
To water your succulent seeds, start by moistening the soil evenly. Use a spray bottle or a watering can with a narrow spout to avoid excessive water pooling around the seeds. It is advisable to use a well-draining soil mixture specifically designed for succulents to prevent waterlogging.
Tip: Before watering, make sure the top inch of the soil is dry. Succulents prefer to be slightly dry between watering sessions.
Once you have watered the seeds, be patient and allow the soil to dry out before watering again. Overwatering can lead to root rot and other issues that may inhibit the growth of your succulent plants.
Remember, different succulent species have varying water requirements. Some may require more frequent watering, while others may thrive with less. It is essential to research the specific needs of the succulent species you are growing to ensure optimal growth.
 Planting Succulent Cuttings: Skip Rooting Process and See Results
Be patient and wait for the seeds to germinate, which can take a few weeks
Germinating succulent seeds can be a rewarding and exciting process. While it requires some patience, the end result is well worth the wait. Below is a step-by-step guide to help you successfully grow succulent seeds at home.
Step 1: Prepare the soil
Start by choosing a well-draining soil mix specifically formulated for succulents. You can either purchase a pre-made mix or create your own by combining equal parts of potting soil, perlite, and coarse sand. Ensure that the soil is loose and free from any clumps.
Step 2: Select the right container
Choose a shallow container with drainage holes to prevent water from accumulating and causing root rot. It's best to use a tray or a seedling tray with a clear plastic cover to create a mini greenhouse effect and maintain humidity.
Step 3: Sow the seeds
Take a pinch of succulent seeds and sprinkle them evenly across the surface of the soil. Avoid overcrowding the seeds, as this can hinder their growth. Gently press the seeds into the soil to ensure good contact.
Step 4: Provide the ideal environment
Place the container in a warm and well-lit area, preferably near a window that receives bright, indirect sunlight. Succulent seeds require warmth to germinate, so maintaining a temperature between 70-75°F (21-24°C) is crucial.
Step 5: Watering and moisture control
Mist the soil lightly with water to moisten it, but avoid oversaturating it. To retain moisture, cover the container with a clear plastic lid or place it in a plastic bag, ensuring that the soil remains slightly moist throughout the germination process. Check the soil periodically and mist as needed.
 Fast-track Succulent Propagation: Tips for Accelerated Growth
Step 6: Be patient and wait
Germination can take anywhere from a few days to several weeks, depending on the succulent variety. It's important to be patient and resist the urge to disturb the seeds during this time. Keep an eye out for tiny green sprouts emerging from the soil, indicating successful germination.
Step 7: Transplanting
Once the succulent seedlings have grown their first set of true leaves, they can be gently transplanted into individual pots filled with well-draining soil. Handle them with care to avoid damaging the delicate roots.
Step 8: Proper care and maintenance
After transplanting, provide your succulent seedlings with adequate sunlight, water sparingly, and avoid overwatering. Gradually increase their exposure to direct sunlight over time to prevent sunburn. Remember to monitor their growth and adjust their care accordingly.
By following these steps, you can successfully grow succulent seeds at home and enjoy the process of nurturing these beautiful plants from their earliest stages.
Once the seedlings have grown, gradually acclimate them to more sunlight
After successfully germinating your succulent seeds, it's time to help the seedlings adjust to their new environment. One crucial step in this process is gradually exposing them to more sunlight. This acclimation process is essential to prevent sunburn and ensure the healthy growth of your succulent seedlings.
Here's a step-by-step guide on how to acclimate your succulent seedlings to more sunlight:
- Start with indirect sunlight: Begin by placing your seedlings in a location that receives indirect sunlight. This can be near a window or in a spot where they are shielded from direct sunlight. Allow them to stay in this location for about a week.
- Gradually increase exposure: After the initial week, start gradually increasing the amount of direct sunlight the seedlings receive. Begin by exposing them to a few hours of morning or late afternoon sun. Make sure to monitor the seedlings for any signs of stress or sunburn.
- Monitor and adjust: Keep a close eye on the seedlings as you increase their exposure to sunlight. If you notice any signs of sunburn, such as reddening or yellowing of the leaves, move them back to a shadier location and decrease the amount of sunlight they receive. Gradually reintroduce them to sunlight when they have recovered.
- Full sun exposure: Once the seedlings have successfully adapted to a few hours of direct sunlight without any signs of stress, you can gradually increase the duration of their sun exposure. Aim for at least six hours of direct sunlight per day, preferably in the morning or late afternoon when the sun is less intense.
- Provide shade during extreme conditions: In extremely hot or scorching weather, it's crucial to protect your succulent seedlings from intense sunlight. Consider providing them with temporary shade using a sheer curtain, shade cloth, or by moving them to a partially shaded area. This will prevent sunburn and keep your seedlings healthy.
Remember, succulents thrive in bright light, but it's important to introduce them gradually to prevent sunburn. By following these steps, you can ensure the successful acclimation of your succulent seedlings to more sunlight, setting them up for healthy growth and vibrant foliage.
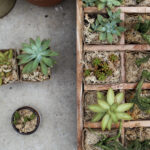
Transplant the seedlings into individual pots when they outgrow their containers
Transplanting succulent seedlings into individual pots is an important step in their growth journey. As these tiny plants begin to outgrow their current containers, it is crucial to provide them with more space and nutrients to thrive.
Step 1: Choose the right time to transplant
Transplanting should be done when the seedlings have developed a strong root system and at least two sets of true leaves. This usually occurs around 2-3 months after germination, but it can vary depending on the succulent species.
Step 2: Prepare the new pots
Before transplanting, make sure to select suitable pots for your succulent seedlings. The pots should have drainage holes to prevent waterlogging and promote proper air circulation. Clean the pots thoroughly to remove any potential contaminants.
Step 3: Prepare the soil mixture
Create a well-draining soil mixture by combining equal parts of potting soil, perlite, and coarse sand. This mixture will provide the necessary nutrients and ensure proper drainage for the young succulents.
Step 4: Gently remove the seedlings from their containers
Take extra care when removing the seedlings from their current containers to avoid damaging their delicate roots. Gently loosen the soil around the seedlings and carefully lift them out, holding onto the leaves rather than the stem.
Step 5: Place the seedlings in their new pots
Make a small hole in the center of each new pot and carefully place the seedling inside, ensuring that the roots are spread out and not bunched up. Be gentle during this process to avoid any root breakage.
Step 6: Fill the pots with soil mixture
Once the seedlings are in position, fill the remaining space in the pots with the prepared soil mixture. Gently press the soil around the base of the seedlings to provide stability and remove any air pockets.
Step 7: Water the newly transplanted seedlings
After transplanting, give the seedlings a thorough watering to settle the soil and help them establish in their new pots. Be careful not to overwater, as succulents are prone to root rot. Allow the soil to dry out between waterings.
Step 8: Provide appropriate light and temperature conditions
Place the newly transplanted seedlings in a location that receives bright, indirect sunlight. Avoid exposing them to intense sunlight or extreme temperatures, as this can cause stress and damage to the tender plants.
By following these steps, you can ensure a smooth transition for your succulent seedlings into their individual pots. Providing them with the right conditions and care will help them grow into healthy and beautiful mature plants.
Continue to provide proper care and maintenance to your succulent plants
Once your succulent seeds have successfully germinated and started to grow, it is important to continue providing them with the proper care and maintenance to ensure their healthy development. Here are some essential steps to follow:
1. Watering
Succulents are known for their ability to store water in their leaves and stems, making them highly drought-tolerant plants. However, it is crucial to find the right balance when it comes to watering.
Water your succulents sparingly, allowing the soil to dry out completely between waterings. Overwatering can lead to root rot and other issues, so it's better to underwater than overwater. Remember, succulents prefer being slightly dehydrated rather than sitting in wet soil.
2. Sunlight
Succulents thrive in bright, indirect sunlight. Place them near a window or in a well-lit area of your home to ensure they receive sufficient light. However, be cautious of direct sunlight, especially during the hottest hours of the day, as it can scorch the leaves of your succulents.
Monitor your succulents closely and adjust their location accordingly based on how they respond to the available light. If you notice stretching or leggy growth, it may indicate insufficient light, while brown or scorched leaves could be a sign of too much direct sunlight.
3. Soil and Potting
Use a well-draining soil mix specifically formulated for succulents. A combination of regular potting soil, perlite, and coarse sand or pumice works well. This type of soil allows excess water to escape quickly, preventing root rot.
When repotting your succulents, choose a pot with drainage holes to ensure proper water drainage. Avoid using pots that are too large as excess soil can retain moisture for longer periods, increasing the risk of overwatering.
4. Fertilizing
Succulents generally require minimal fertilization. During the growing season, which is typically in spring and summer, you can use a balanced, water-soluble fertilizer diluted to half or quarter strength. Apply the fertilizer once every two to four weeks, following the instructions on the packaging.
However, avoid fertilizing during the dormant season, which is usually in fall and winter. Succulents naturally slow down their growth during this time, and excess nutrients can harm the plants.
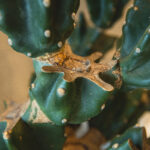
5. Pruning and Propagation
Regularly inspect your succulents for any dead or damaged leaves and remove them using clean, sharp scissors or pruning shears. This helps maintain the overall health and appearance of your plants.
If you notice your succulent has grown leggy or stretched out, you can consider propagating it. Cut off a healthy stem or leaf, allow it to callus over for a few days, and then plant it in a well-draining soil mix. With proper care, the propagated cuttings can grow into new succulent plants.
By following these care guidelines, you can enjoy the beauty of your succulent plants for years to come. Remember, each succulent variety may have its own specific care requirements, so it's always a good idea to research and understand the needs of the specific succulent species you are growing.
Frequently Asked Questions
1. Can I grow succulent seeds indoors?
Yes, you can grow succulent seeds indoors as long as they receive sufficient light and are provided with the right growing conditions.
2. How long does it take for succulent seeds to germinate?
The germination time for succulent seeds can vary, but it usually takes around 1-3 weeks for them to start sprouting.
3. What are the ideal growing conditions for succulent seeds?
Succulent seeds thrive in well-draining soil, temperatures between 70-85°F (21-29°C), and bright indirect sunlight.
4. How often should I water succulent seedlings?
Succulent seedlings should be watered sparingly, only when the top inch of soil is dry. Overwatering can cause root rot and harm the young plants.
If you want to read more articles similar to Growing Succulent Seeds at Home: A Step-by-Step Guide, you can visit the Propagation category.
Planting Succulent Cuttings: Skip Rooting Process and See Results

Exploring Root Depths in Succulents: Understanding Root Growth

Succulent Root Growth: Unveiling Patterns and Depths

Can Succulent Leaves Grow Roots When Planted in Soil?

Step-by-Step Guide: Growing a Beautiful Rose Succulent
How to Propagate a Rock Succulent by Splitting: Step-by-Step Guide
You Must Read