
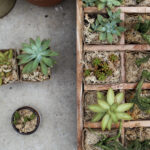
Can I Easily Propagate Succulents by Leaf Propagation?

Succulents have become increasingly popular in recent years, thanks to their unique appearance and low maintenance requirements. These plants, known for their thick, fleshy leaves, come in a wide variety of shapes, sizes, and colors, making them a favorite among plant enthusiasts and beginners alike. One of the most fascinating aspects of succulents is their ability to propagate through various methods, including leaf propagation.
We will explore the process of propagating succulents through leaf propagation. We will discuss what leaf propagation is and how it works, as well as the benefits and challenges of this method. Additionally, we will provide step-by-step instructions on how to successfully propagate succulents using this technique, along with tips and tricks to ensure the best results. Whether you are a seasoned succulent grower or a beginner looking to expand your collection, this article will provide you with all the information you need to propagate succulents through leaf propagation.
Content
- Yes, leaf propagation is one of the easiest ways to propagate succulents
- Simply remove a healthy leaf from the parent plant
- Let the leaf callus over for a few days
- Place the leaf on top of well-draining soil
- Mist the soil lightly every few days to keep it moist
- After a few weeks, roots and a new plantlet will start to grow from the leaf
- Once the new plantlet has established roots, it can be potted into its own container
- Leaf propagation is a great way to increase your succulent collection without buying new plants
- It's also a fun and rewarding process to watch your new succulents grow from a single leaf
- Frequently Asked Questions
Yes, leaf propagation is one of the easiest ways to propagate succulents
Leaf propagation is a popular and straightforward method of propagating succulents. Whether you are an experienced gardener or a beginner, this technique can be easily mastered with a little patience and care.
So, how does leaf propagation work? It involves removing a healthy leaf from a mature succulent and allowing it to sprout roots and develop into a new plant. This process is possible because succulents have the remarkable ability to grow new plants from their leaves.
To successfully propagate succulents through leaf propagation, follow these simple steps:
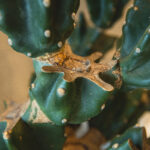
Step 1: Select a Healthy Leaf
Choose a mature leaf from a healthy succulent. Look for leaves that are plump, firm, and free from any signs of damage or disease. Healthy leaves have a higher chance of successfully producing new plants.
Step 2: Gently Remove the Leaf
Using a clean and sharp pair of scissors or a knife, carefully cut the leaf from the succulent's stem. Make sure to leave a short stem attached to the leaf as this will help with rooting.
 Water Propagation of Succulents: A Comprehensive Guide
Step 3: Allow the Leaf to Callus
Place the leaf in a dry and shaded area for a few days to allow it to callus. Callusing is essential as it prevents the leaf from rotting when it comes into contact with moisture.
Step 4: Prepare a Well-Draining Soil or Growing Medium
While the leaf is callusing, prepare a well-draining soil or growing medium for the new succulent plant. Succulents thrive in soil that provides good drainage to prevent root rot.
Step 5: Plant the Leaf
Once the leaf has callused, gently place it on top of the prepared soil or growing medium. Ensure that the end with the stem is inserted into the soil, while the leaf remains above the surface.
Step 6: Provide Adequate Light and Water
Place the container in a well-lit area where the succulent leaf can receive indirect sunlight. Avoid exposing it to harsh, direct sunlight as this can cause sunburn. Water the leaf sparingly, making sure not to overwater it. Succulents prefer dry conditions, and excessive moisture can lead to rotting.
Step 7: Wait for Roots and New Growth
With proper care and patience, roots should begin to develop from the stem within a few weeks. As the new plant takes root, you may also notice new growth emerging from the base of the leaf. This is a sign that your leaf propagation has been successful!
Remember to keep the soil slightly moist but not soaked and provide adequate light for the new succulent plant to thrive. Over time, the leaf will wither and die, but the new plant will continue to grow and flourish.
Leaf propagation is a rewarding and accessible method for expanding your succulent collection. By following these steps and giving your succulent leaf the care it needs, you can enjoy the satisfaction of growing new plants from a single leaf.
 Dormancy in Succulents: A Guide to Varieties and Timing
Simply remove a healthy leaf from the parent plant
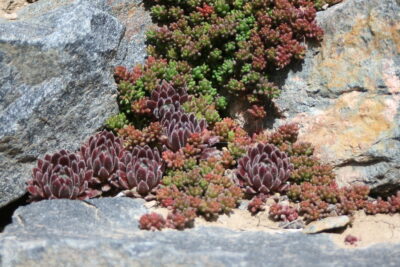
Leaf propagation is a popular and effective method for propagating succulents. It allows you to create new plants from a single leaf, making it a cost-effective and fun way to expand your succulent collection. The process is relatively simple and can be done by following a few easy steps.
Step 1: Choose a healthy leaf
To begin the leaf propagation process, carefully select a healthy leaf from the parent plant. Look for a mature leaf that is plump and free from any signs of damage or disease. This will ensure that the leaf has the best chance of successfully rooting and developing into a new plant.
Step 2: Gently remove the leaf
Using a clean pair of scissors or your fingers, gently twist the leaf from the stem of the parent plant. Make sure to remove the entire leaf, including the base where it attaches to the stem. Avoid tearing or damaging the leaf during this process, as it can hinder its ability to root.
Step 3: Allow the leaf to callus
Once the leaf has been removed, place it in a dry and shaded location for a few days to allow the cut end to callus over. This callus will help protect the leaf from rotting when it comes into contact with moisture during the rooting process.
Step 4: Prepare a suitable rooting medium
While the leaf is callusing, prepare a suitable rooting medium for the propagation. Succulents prefer well-draining soil, so mix together equal parts of cactus potting mix and perlite or pumice. This will provide the ideal conditions for the leaf to root and grow.
Step 5: Plant the leaf in the rooting medium
Once the leaf has callused, gently place it on top of the rooting medium, ensuring that the cut end is in contact with the soil. You can lightly press the leaf into the soil to help it make good contact. Avoid burying the leaf completely, as this can increase the risk of rotting.
Step 6: Provide the right conditions
Place the planted leaf in a bright location with indirect sunlight. Avoid exposing it to direct sunlight, as this can cause the leaf to burn or dry out. Water the leaf sparingly, allowing the soil to dry out between waterings. Overwatering can lead to rot, so it's important to find the right balance.
 Can Succulent Cuttings Be Planted Directly in Soil?
Step 7: Be patient and wait for roots to develop
Root development can take several weeks or even months, depending on the succulent species and environmental conditions. Be patient and resist the urge to overwater or disturb the leaf during this time. Keep an eye out for signs of new growth, such as tiny roots or small plantlets emerging from the base of the leaf.
Once the leaf has developed a strong root system and new growth, you can carefully transplant it into its own pot or garden bed. With proper care and attention, your propagated succulent will continue to grow and thrive, adding beauty to your indoor or outdoor space.
Leaf propagation is a fascinating and rewarding way to propagate succulents. With a little patience and care, you can easily expand your succulent collection and enjoy the beauty of these unique plants.
Let the leaf callus over for a few days
When it comes to propagating succulents, one popular method is leaf propagation. This technique involves taking a leaf cutting from a mature succulent and allowing it to develop new roots and eventually grow into a new plant. However, before you start this process, it is important to let the leaf callus over for a few days.
What does it mean for a leaf to callus over? Essentially, it is the process of the cut end of the leaf drying out and forming a protective layer. This callus helps to prevent the leaf from rotting or developing infections when it is placed in soil or water for propagation.
To allow the leaf to callus over, simply place it in a well-ventilated area away from direct sunlight. This will help the cut end to dry out and form a callus. Depending on the succulent species and environmental conditions, it typically takes around 2-7 days for the leaf to callus over.
During this callusing period, it is important to keep the leaf dry. Avoid misting or watering the leaf, as excessive moisture can hinder the callus formation and increase the risk of rotting. Instead, let nature take its course and allow the leaf to dry naturally.
 Propagation of Succulents: Cutting Techniques and Methods
Once the leaf has developed a callus, you are ready to move on to the next step in the leaf propagation process. This callus will serve as a protective layer when the leaf is planted or placed in water to encourage root growth.
Remember, patience is key when propagating succulents through leaf propagation. By allowing the leaf to callus over, you are setting the stage for successful propagation and the growth of new plants.
Place the leaf on top of well-draining soil
When it comes to propagating succulents, leaf propagation is a popular and easy method. This technique involves taking a leaf cutting from a mature succulent plant and allowing it to develop roots before planting it in soil. If you're new to succulent propagation, you may be wondering how to go about placing the leaf on top of well-draining soil.
First and foremost, you'll need to choose a suitable leaf for propagation. Look for a healthy leaf that is fully grown and plump, as these tend to have a higher success rate. Gently twist the leaf off the stem of the parent plant, ensuring that you remove it completely without leaving any part behind.
Once you have your leaf, it's time to prepare the soil. Succulents thrive in well-draining soil that allows excess water to flow through easily. You can either purchase a pre-made succulent soil mix or create your own by combining regular potting soil with coarse sand or perlite. This will ensure that the soil doesn't become waterlogged, which can lead to root rot.
Next, create a small indentation in the soil where you'll place the leaf. This will help to keep the leaf stable and prevent it from moving around. Gently place the leaf on top of the soil, making sure that the side that was attached to the stem is facing downwards. This is where the roots will eventually emerge from.
It's important to note that you shouldn't bury the leaf completely in the soil. The leaf should only be partially buried, with the majority of it exposed to the air. This allows the leaf to receive the necessary light and air circulation for successful propagation.
 Succulent Root Growth: Unveiling Patterns and Depths
Once the leaf is in place, lightly press down on the soil around it to ensure good contact between the leaf and the soil. This will help the leaf to establish roots more easily. Be careful not to press too hard, as succulent leaves are delicate and can easily break if handled roughly.
Finally, water the soil lightly. Mist the soil with a spray bottle or use a watering can with a fine spout to avoid overwatering. Succulents don't require a lot of water, especially during propagation, so it's important to avoid soggy soil. Allow the soil to dry out between waterings, as this will encourage the development of roots.
Placing the leaf on top of well-draining soil is a crucial step in the leaf propagation process for succulents. By following these steps and providing the right conditions, you'll be well on your way to successfully propagating your own succulent plants.
Mist the soil lightly every few days to keep it moist
Mist the soil lightly every few days to keep it moist
One important step in the leaf propagation process is to keep the soil moist. This is crucial for the successful growth of new succulent plants. To achieve this, it is recommended to mist the soil lightly every few days.
When misting the soil, it is important to not overdo it. Excessive moisture can lead to issues like root rot or fungal infections. The goal is to provide enough moisture to keep the soil damp but not saturated.
 Growing Blue Bean Succulents: A Guide for Home Gardeners
Using a spray bottle filled with water, gently mist the soil surface, focusing on the areas where the leaves are planted. Be careful not to spray directly on the leaves, as this can cause damage or promote the growth of mold.
Regularly monitoring the moisture level of the soil is crucial. If the soil feels dry to the touch, it's time to mist it again. However, if the soil feels damp, it's best to wait a bit longer before misting to prevent overwatering.
Remember that different succulent varieties may have slightly different moisture requirements. Some succulents prefer drier conditions, while others may thrive in slightly more moisture. It's important to research the specific needs of the succulents you are propagating by leaf propagation to ensure their optimal growth.
After a few weeks, roots and a new plantlet will start to grow from the leaf
Leaf propagation is a popular and easy method of propagating succulents. This technique allows you to create new plants from just a single leaf, making it a cost-effective way to expand your succulent collection.
When selecting a leaf for propagation, it's important to choose a healthy and mature leaf from a well-established succulent. Gently twist the leaf from the stem, making sure to remove it cleanly without any damage.
Once you have your leaf, let it callous over for a few days to prevent rotting. This can be done by placing the leaf in a dry and shady spot. After the leaf has calloused, you can now proceed with the propagation process.
 Planting Succulent Cuttings: Skip Rooting Process and See Results
- Prepare a well-draining potting mix suitable for succulents. A mixture of cactus soil and perlite or coarse sand works well.
- Take the calloused leaf and place it on top of the potting mix, ensuring that it makes good contact with the soil. You can gently press the leaf into the soil to secure it.
- Water the potting mix lightly, just enough to moisten it. Avoid overwatering as succulents are prone to root rot.
- Place the pot in a warm and sunny location, preferably near a window or under grow lights. Succulents thrive in bright light conditions.
- After a few weeks, roots will start to grow from the base of the leaf and eventually a new plantlet will emerge. This is an exciting stage, as it indicates successful propagation!
It's important to be patient during this process, as succulents generally have a slower growth rate. Keep an eye on the moisture level of the potting mix, ensuring it doesn't dry out completely or become waterlogged.
Once the new plantlet has grown a few inches and developed its own set of roots, you can gently separate it from the original leaf. Carefully transplant the new plantlet into its own pot with well-draining soil.
Leaf propagation is a rewarding and fascinating way to expand your succulent collection. With a little care and patience, you can easily propagate succulents and enjoy the satisfaction of watching them grow into beautiful new plants.
Once the new plantlet has established roots, it can be potted into its own container
Leaf propagation is a popular method for propagating succulents, as it allows you to create new plants from just a single leaf. While it may take some time and patience, it is a relatively easy process that can be done by any succulent enthusiast.
Once the new plantlet has developed roots, it is ready to be potted into its own container. Here are some steps to follow:
- Select a suitable container: Choose a container that has drainage holes to prevent water from pooling and causing root rot. It should be slightly larger than the root system of the plantlet.
- Prepare the potting mix: Succulents require well-draining soil to thrive. You can prepare a suitable potting mix by combining equal parts of cactus soil, perlite, and coarse sand.
- Fill the container: Fill the container with the potting mix, leaving some space at the top for watering.
- Plant the new plantlet: Gently place the plantlet into the container, making sure its roots are covered with soil. Be careful not to bury the plantlet too deep, as this can lead to rotting.
- Water the plantlet: Give the newly potted plantlet a thorough watering, allowing the water to drain out completely. Succulents prefer to be slightly underwatered, so make sure the soil dries out between waterings.
- Provide proper light and temperature: Place the potted plantlet in a location that receives bright, indirect sunlight. Avoid exposing it to direct sunlight, as this can cause sunburn. Succulents thrive in temperatures between 60°F and 80°F (15°C and 27°C).
- Maintain proper care: Continue to care for the potted plantlet by providing it with the right amount of water and sunlight. Avoid overwatering, as this can lead to root rot. Fertilize the plantlet with a balanced succulent fertilizer once every few months.
By following these steps, you can successfully pot the new plantlet produced through leaf propagation. With proper care, it will grow into a healthy and thriving succulent that can be enjoyed for years to come.
 Fast-track Succulent Propagation: Tips for Accelerated Growth
Leaf propagation is a great way to increase your succulent collection without buying new plants
Leaf propagation is a popular and easy method for propagating succulents. It allows you to grow new plants from healthy leaves, ultimately increasing your succulent collection without having to spend money on buying new plants.
How does leaf propagation work?
Leaf propagation involves removing a leaf from a parent succulent plant and allowing it to develop roots and eventually grow into a new plant. This process is possible because succulents have the ability to produce new plants from their leaves, making them an ideal choice for leaf propagation.
Step-by-step process for leaf propagation:
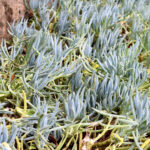
- Select a healthy leaf from a mature succulent plant. It's important to choose a leaf that is plump and free from any signs of damage or disease.
- Gently twist the leaf from the parent plant, ensuring that the entire leaf is intact. Be careful not to damage the leaf or the stem during this process.
- Allow the leaf to dry and callus over for a few days. This step is crucial as it helps to prevent the leaf from rotting once it's planted.
- Prepare a well-draining potting mix suitable for succulents. You can use a combination of perlite, sand, and regular potting soil to create the perfect mix.
- Place the calloused end of the leaf into the potting mix, burying it slightly. Make sure the leaf is in contact with the soil to promote root growth.
- Water the leaf sparingly, ensuring that the soil is moist but not overly saturated. Succulents are drought-tolerant plants, so it's important not to overwater them.
- Position the potted leaf in a bright, indirect light location. Avoid placing it in direct sunlight as this can cause the leaf to burn.
- Be patient and wait for the magic to happen! Over time, you will start to see tiny roots emerge from the calloused end of the leaf, followed by the growth of a small rosette or baby plant.
- Once the new plant has matured and developed a healthy root system, you can carefully separate it from the leaf and transfer it into its own pot.
Tips for successful leaf propagation:
- Choose healthy leaves from mature succulent plants to increase the chances of successful propagation.
- Ensure that the potting mix is well-draining to prevent root rot.
- Avoid overwatering the leaf, as this can lead to rotting.
- Provide adequate light for the leaf to promote healthy growth.
- Be patient and allow the leaf to develop roots and a new plant at its own pace.
Leaf propagation is not only a cost-effective way to expand your succulent collection but also a rewarding experience. Watching a tiny leaf transform into a thriving plant can bring immense joy and satisfaction to any succulent enthusiast.
 Propagating Split Rocks Succulents: Can They Be Divided for Growth?
So, the next time you find a healthy leaf on one of your favorite succulents, don't hesitate to give leaf propagation a try!
It's also a fun and rewarding process to watch your new succulents grow from a single leaf
Leaf propagation is a popular and easy method to propagate succulents. It involves taking a leaf or a part of a leaf from a mature succulent plant and using it to grow a new plant. Not only is leaf propagation a cost-effective way to expand your succulent collection, but it also allows you to witness the fascinating process of new growth.
Before you begin leaf propagation, it's important to choose a healthy and mature succulent plant. Look for a leaf that is plump, firm, and free from any signs of damage or disease. This will increase the chances of successful propagation.
The Leaf Propagation Process
1. Gently twist or cut a leaf from the stem of the succulent using a clean, sharp knife or scissors. Make sure to leave a small portion of the leaf's stem intact.
2. Allow the leaf to dry for a few days until the cut end calluses over. This step is crucial as it helps prevent the leaf from rotting during the propagation process.
3. Prepare a well-draining soil mix suitable for succulents. A mix of equal parts perlite, coarse sand, and potting soil is often recommended. Fill a shallow container or tray with this soil mix.
 Step-by-Step Guide: Growing a Beautiful Rose Succulent
4. Place the calloused end of the leaf into the soil mix, burying it slightly. Ensure that the leaf remains upright and does not touch the soil to prevent rotting.
5. Mist the soil lightly with water to moisten it, but be careful not to overwater. Succulents are adapted to arid conditions and excess moisture can lead to rotting.
6. Place the container in a warm and bright location, but away from direct sunlight. Indirect light will provide the ideal conditions for the leaf to develop roots.
7. Be patient and wait for the magic to happen! Over the course of several weeks or months, you will start to see tiny roots emerging from the base of the leaf. This is a sign that the leaf has successfully rooted and is ready to grow.
8. Once the new plantlet has developed several sets of leaves and is sturdy enough, you can carefully separate it from the original leaf and transfer it to its own pot. Handle the new succulent with care to avoid damaging the delicate roots.
Remember, not all leaves will successfully propagate, so don't be discouraged if some of them do not root or produce new plants. Leaf propagation is a process of trial and error, but it's a rewarding experience when you successfully grow new succulents from a single leaf.
Tips for Successful Leaf Propagation
- Choose healthy and mature leaves for propagation.
- Allow the cut end of the leaf to callus before planting.
- Use a well-draining soil mix suitable for succulents.
- Avoid overwatering and ensure the soil is only lightly moist.
- Provide bright, indirect light for the leaf to develop roots.
- Be patient and give the leaf enough time to root and grow.
- Separate the new plantlet from the original leaf carefully to avoid damage.
By following these steps and tips, you can easily propagate succulents through leaf propagation. It's a satisfying way to expand your collection and witness the miracle of new plant growth.
Frequently Asked Questions
1. Can I Easily Propagate Succulents by Leaf Propagation?
Yes, leaf propagation is a popular and relatively easy method to propagate succulents.
2. How do I Propagate Succulents by Leaf Propagation?
To propagate succulents by leaf propagation, gently remove a healthy leaf from the mother plant, allow it to callus for a few days, and then place it on well-draining soil. Mist the soil occasionally and wait for new roots and baby plants to emerge.
3. Which Succulents are Suitable for Leaf Propagation?
Many succulents can be propagated by leaf propagation, including Echeveria, Sedum, Crassula, and Graptopetalum.
4. How Long Does it Take for Succulent Leaves to Root and Produce New Plants?
The time it takes for succulent leaves to root and produce new plants can vary, but it usually takes around 2 to 6 weeks for roots to form and new plants to start growing.
If you want to read more articles similar to Can I Easily Propagate Succulents by Leaf Propagation?, you can visit the Propagation category.
Planting Succulent Cuttings: Skip Rooting Process and See Results

Exploring Root Depths in Succulents: Understanding Root Growth

Succulent Root Growth: Unveiling Patterns and Depths

Can Succulent Leaves Grow Roots When Planted in Soil?

Step-by-Step Guide: Growing a Beautiful Rose Succulent
How to Propagate a Rock Succulent by Splitting: Step-by-Step Guide
You Must Read